INTRODUCTION
In this tutorial, we’ll show you how to integrate ADventori library in Google Web Designer to dynamize HTML5 ads. The starting point is created respecting the IAB standards :
- It must be in the form of a zip file containing a single HTML file and all the necessary elements (img, js, css).
- The URLs in the HTML file must all be relatives.
Note: ADventori isn’t limited on the weight of the creative, but to optimize the delivery, we recommend keeping weight under 200kbytes.
- Don’t forget to produce the backup GIF for each format
- Thanks to respect the same naming convention for all assets in all formats
MENU
INSTALLING ADVENTORI’S ENABLER
Create a new Google Web Designer project (Folder –> New–>Banner ), in the section Environment, click on Announcement other than Google and confirm.
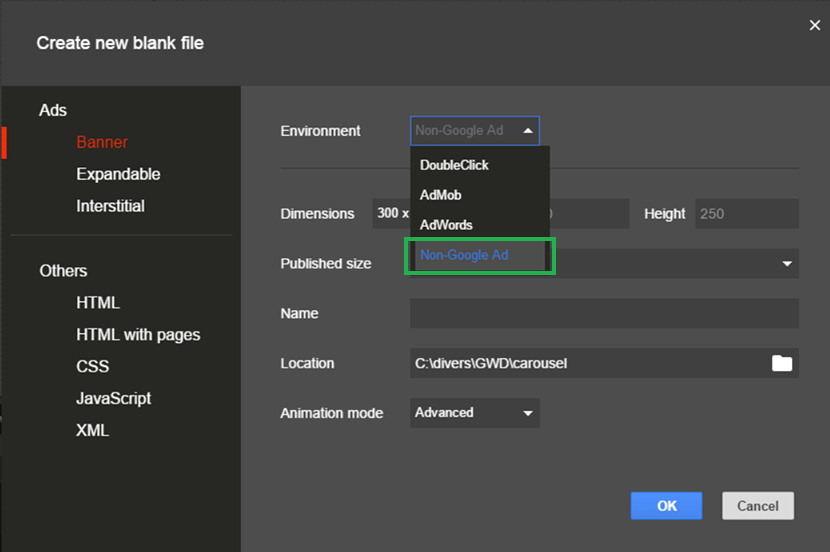
Then enter the URL of the library ADventori http://adventori.com/lp/enabler/ADventori-2.0.0.js andhttp://adventori.com/lp/enabler/ADventori-2.0.0.css in the project source code part :
 <script src="http://adventori.com/lp/enabler/ADventori-2.0.0.js" type="text/javascript"></script>
 <link href="http://adventori.com/lp/enabler/ADventori-2.0.0.css" type="text/css" />
![]()

GWD : PUBLISHING SETTING
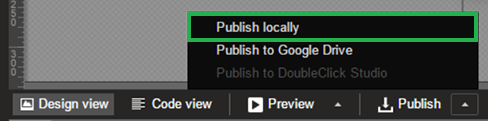
- Down the scene click “Publish”:
- Select “Publish locally”
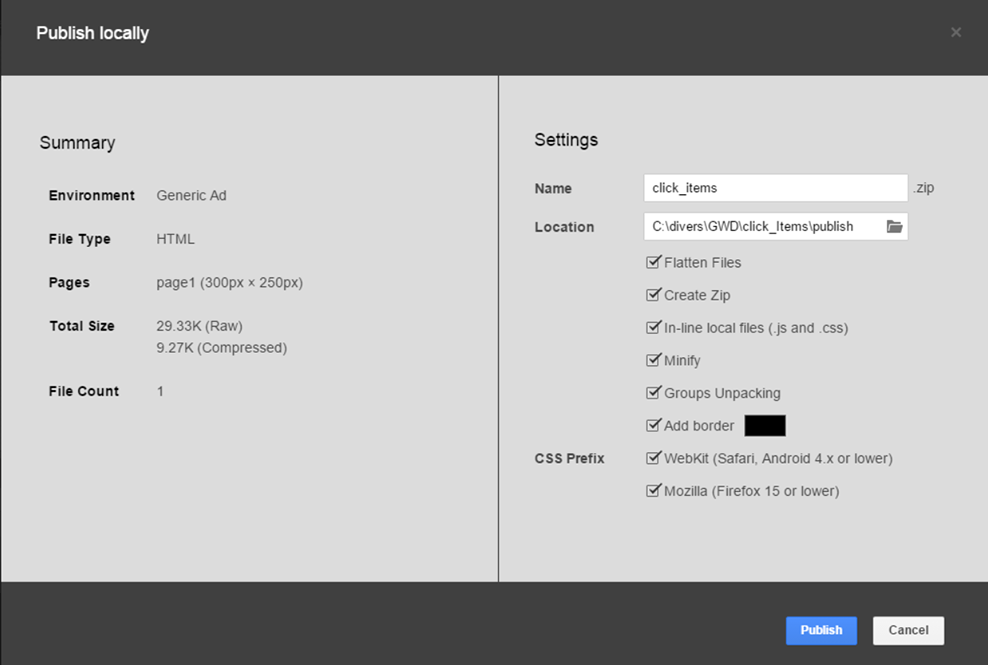
- Configure advanced settings:
- Check the settings as shown against
- Save settings
MANAGE THE CLICK
Banner with a redirect
Clicks on the advertisement must be sent to the AdServer to be counted and redirect the user to the correct page.
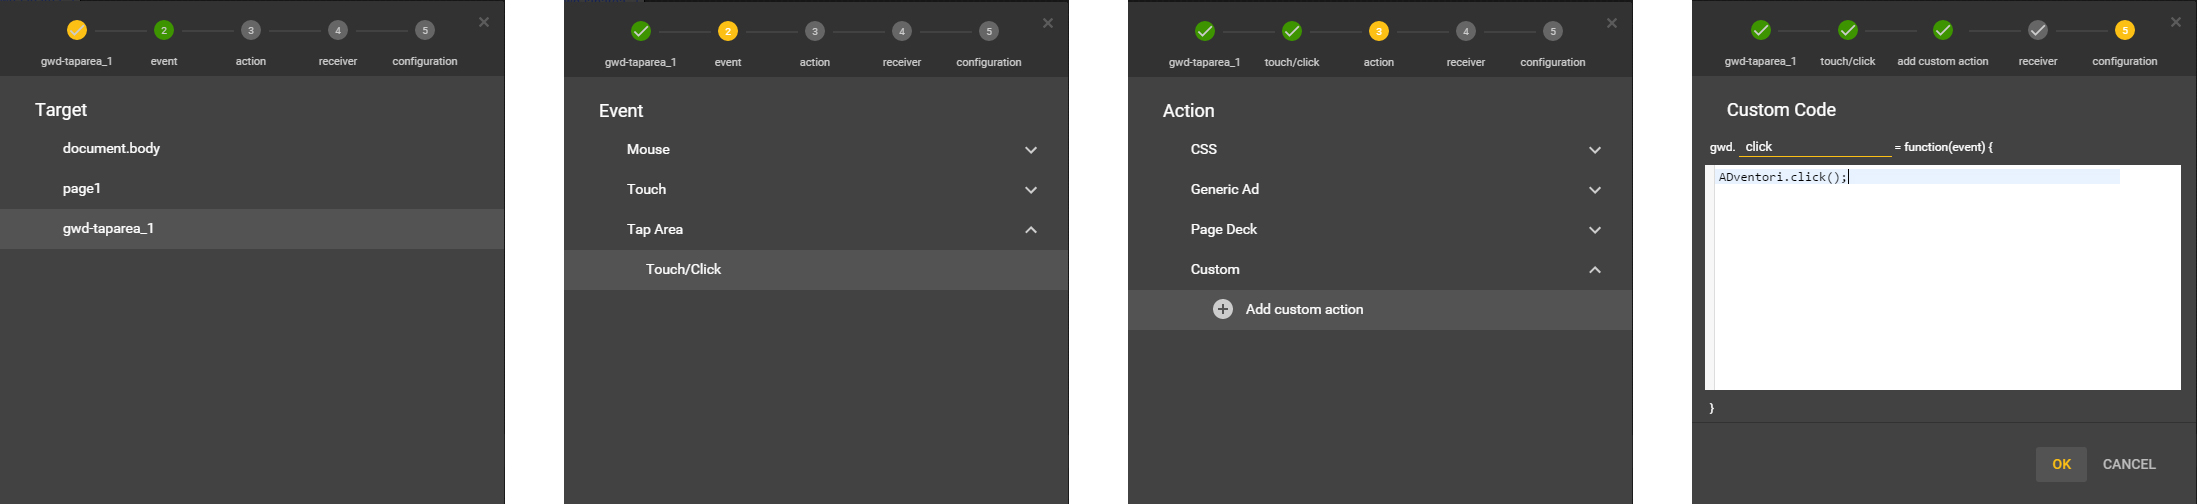
First you have to install a Tap Area. You can find it in the Components pannel. Make sure this area got the same size than the Ad.
Select the taparea
In the Event tab, click the “+” button
Add the code ADventori.click(); to the click event (see below):
Result :
Banner with several redirects
A clickable area by product
In case you have several products, each with a redirect URL:
Add the code below and insert it right after calling the ADventori library.
ADventori.initData({ items: [{"id":1,"data":{"url":"http://www.urlitem1.com"}},{"id":2,"data":{"url":"http://www.urlitem2.com"}},{"id":3,"data":{"url":"http://www.urlitem3.com"}},{"id":4,"data":{"url":"http://www.urlitem4.com"}}]});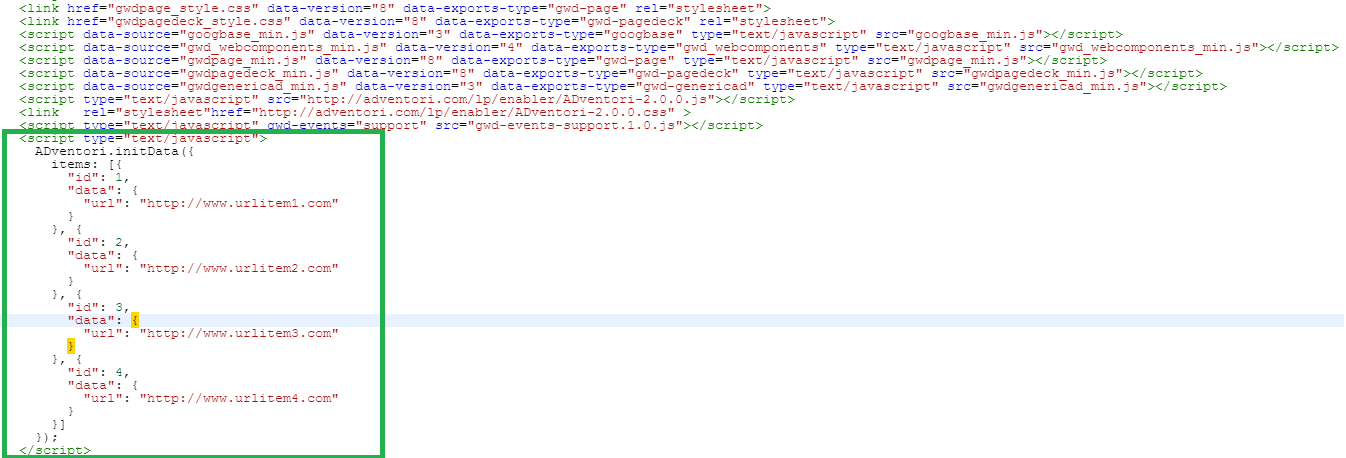
This code initialize the dynamic elements once the banner is fully charged.
Then, on each area of items, add an event click to manage redirection and add the following code: ADventori.click(event,ADventori.data.items[0]); , 0 is the first, 1 second …
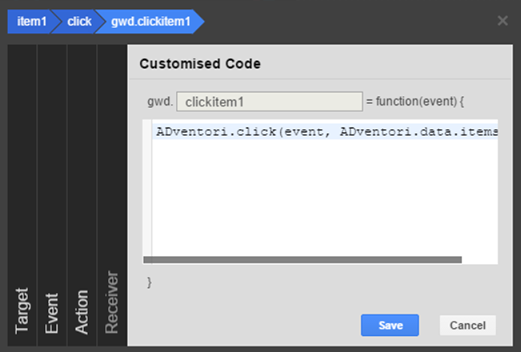
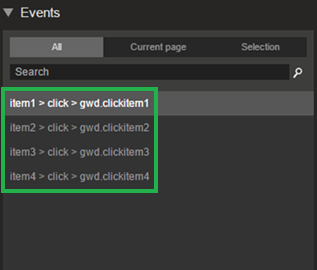
Inspect tab code, you should have the following result:
Result :
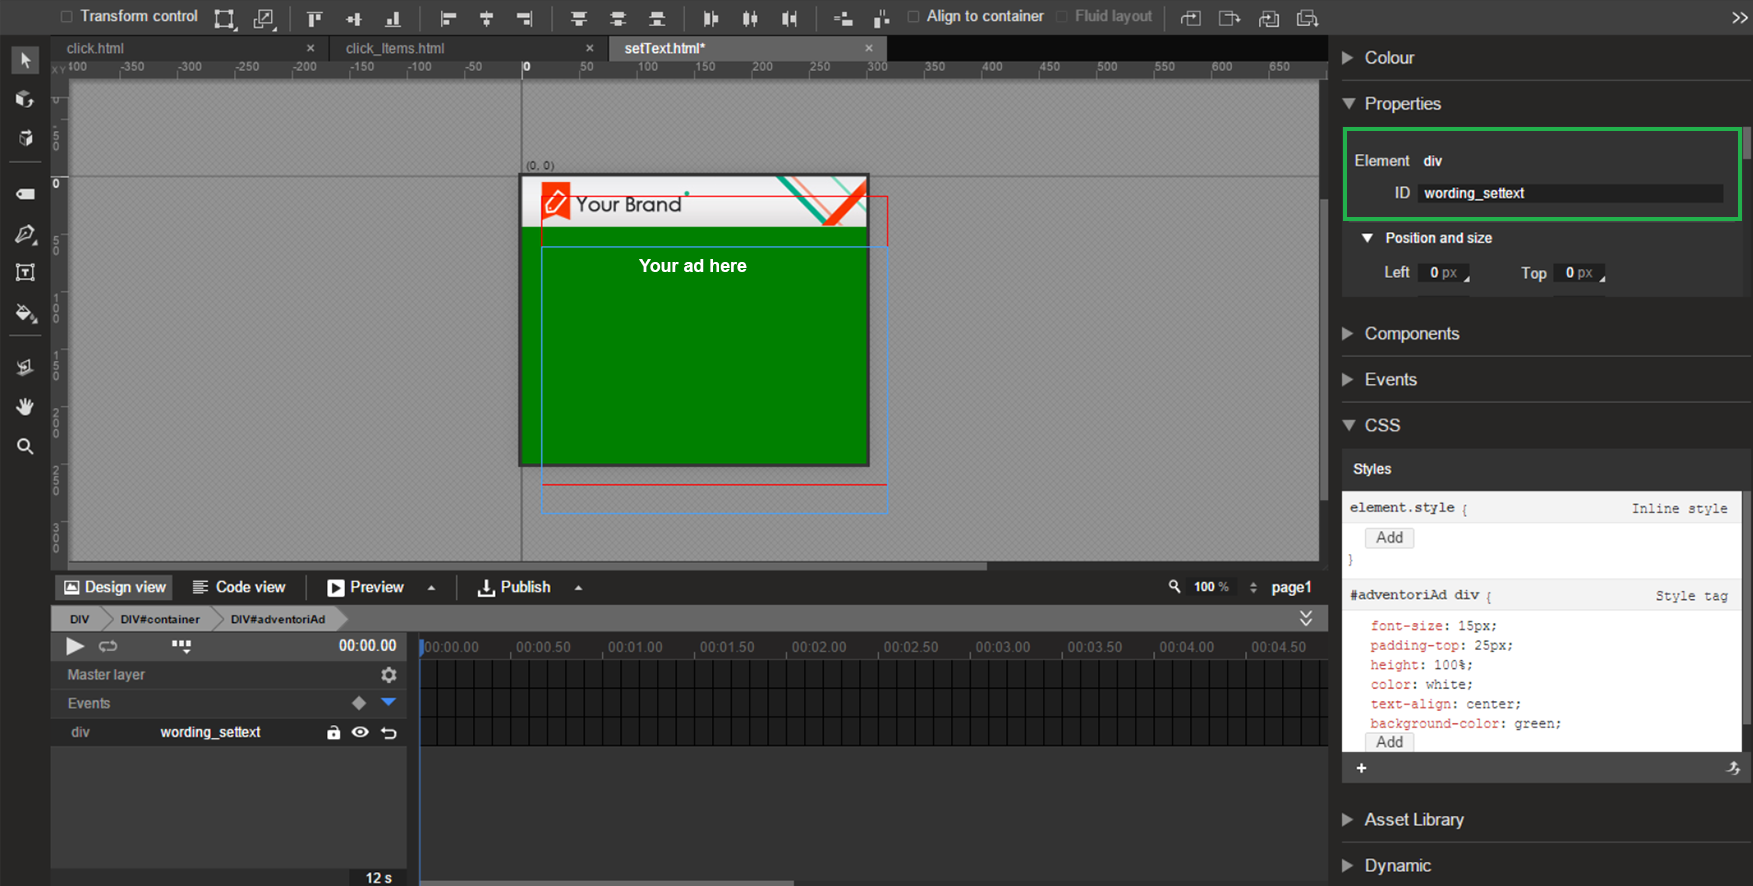
DYNAMIZE A TEXT ZONE
To create a dynamic HTML tag, add an attribute id unique (field properties), and set the value of the text (setText).
Once the creative driven by our AdServer, texts will change according to established parameters (Geolocation, weather, date / time, cookies, retargeting …)
Insert the following code after the html code of the page (after the tag gwd-genericad) :
ADventori.initData( {"wording": "Even though using lorem ipsum often arouses curiosity due to its resemblance to classical Latin, it is not intended to have meaning. Where text is visible in a document, people tend to focus on the textual content rather than upon overall presentation, so publishers use lorem ipsum when displaying a typeface or design in order to direct the focus to presentation"}); ADventori.Format.setText(document.getElementById('wording_settext'), ADventori.data.wording); Result:
ADJUST TEXT SIZE
If you want to insert dynamic text into your creative, but this text may take in some cases, more space than the space reserved for it in the div, you can use the method adaptText.
The method adaptText reduces the font size on a given element, “10” is the accepted minimum size.
In case the entire text does not fit in the space reserved for it and its font size is 15px, then the method will reduce it to 10px.
Example:
ADventori.initData ( {"wording": "Even though using lorem ipsum often arouses curiosity due to its resemblance to classical Latin, it is not intended to have meaning. Where text is visible in a document, people tend to focus on the textual content rather than upon overall presentation, so publishers use lorem ipsum when displaying a typeface or design in order to direct the focus to presentation"}); ADventori.Format.setText(document.getElementById('wording'), ADventori.data.wording); ADventori.Display.adaptText(document.getElementById('wording'), 10); Result :
You want to dynamize and adapt your text directly? The method setAndAdaptText is made for you :
ADventori.initData ( {"wording": "Even though using lorem ipsum often arouses curiosity due to its resemblance to classical Latin, it is not intended to have meaning. Where text is visible in a document, people tend to focus on the textual content rather than upon overall presentation, so publishers use lorem ipsum when displaying a typeface or design in order to direct the focus to presentation"}); ADventori.Display.setAndAdaptText(document.getElementById('wording'), ADventori.data.wording); Result
VERTICALLY ALIGN YOUR TEXT
You have a banner with different text to display based on your campaign scenarios and you want them to automatically be centered in their div.
The method verticalAlign adapts vertically a block of text automatically and center it in its div.
ADventori.initData ( {"wording": "Lorem Ipsum is simply dummy text for composition."}); ADventori.Format.setText(document.getElementById('votrediv'), ADventori.data.wording); ADventori.Display.verticalAlign(document.getElementById('votrediv'));
DYNAMIZE AND ADAPT THE SIZE OF AN IMAGE
You can dynamize your ad images without them being distorted and keeping their full visibility.
To create a zone of dynamic, resizable pictures, add an attribute id unique, and set the value of the image (addAndAdaptImage) by default.
Once the creative is driven by our AdServer, images change according to the established parameters (Geolocation, weather, date / time, cookies, retargeting …).
For this, you must give awidth and a height to the div containing your image to make it fit.
ADventori.initData({ "photoV": 'http://img.over-blog-kiwi.com/0/40/01/35/201301/ob_1264f6_location-voiture-guadeloupe-dacia.jpg', "photoH": 'http://www.alldigi.com/wp-content/uploads/2010/06/DSC_1332-1333-Panorama.jpg' }); ADventori.Display.addAndAdaptImage(document.getElementById('photo-verticale'), ADventori.data.photoV, "http://img.over-blog-kiwi.com/0/40/01/35/201301/ob_1264f6_location-voiture-guadeloupe-dacia.jpg"); ADventori.Display.addAndAdaptImage(document.getElementById('photo-horizontale'), ADventori.data.photoH, "http://img.over-blog-kiwi.com/0/40/01/35/201301/ob_1264f6_location-voiture-guadeloupe-dacia.jpg");
Other personalization methods available:
- adaptImage(element,url,urldefault) : This method allows you to adjust the image size relative to its container.
- addImage(element,url,urldefault) : This method allows you to add an image to the specified container.
TEST YOUR MOBILE HTML5 BANNER
If you want to test your creation Html5 In App (Android): https://play.google.com/store/apps/details?id=com.google.android.apps.audition&hl=en_EN
https://play.google.com/store/apps/details?id=com.smartadserver.android.dashboard&hl=en_EN
If you want to test your creation Html5 In App (Ios): https://itunes.apple.com/en/app/smart-adserver-dashboard/id487176494?mt=8
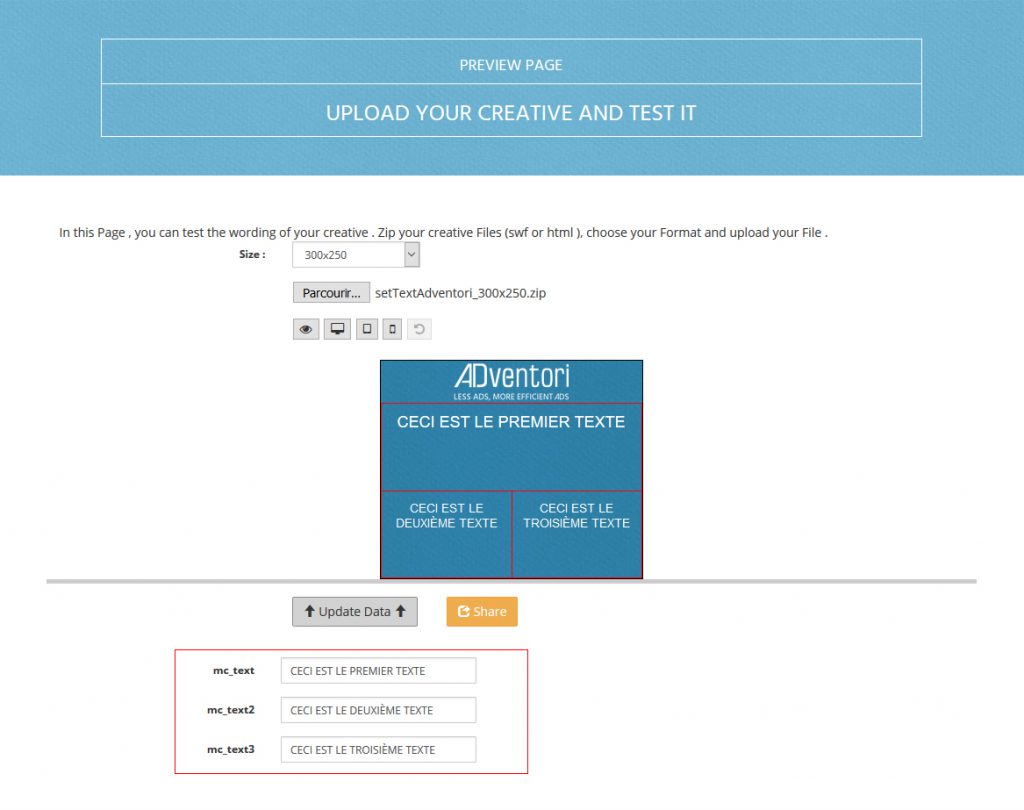
TESTING AND BANNERS VALIDATION
To test a banner, it’s easy.
Just publish your Google Web Designer project (with pictures …) and test this Test page :
ADventori.initData({mc_text:"THIS IS THE FIRST TEXT",mc_text2:'THIS IS THE SECOND TEXT',mc_text3:'THIS IS THE THIRD TEXT'});The dynamic parameters in ADventori.initData should appear:
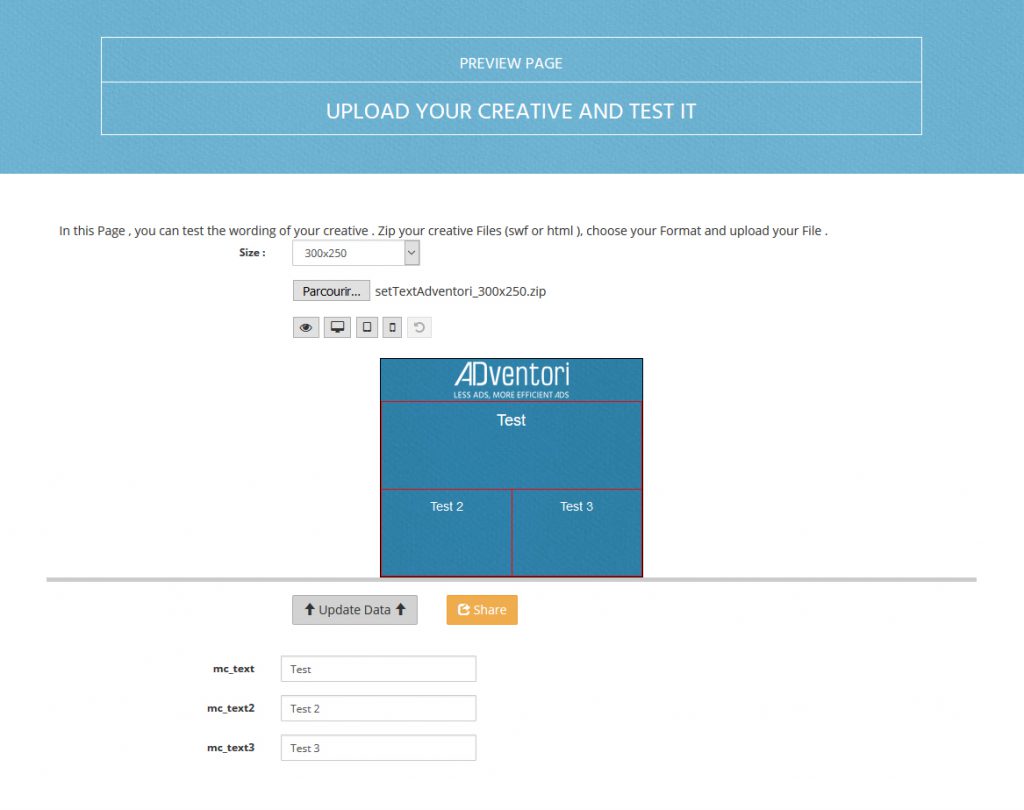
You can change your default wordings to simulate your scenarios.
Click Display creative, dynamic parameters are transmitted to the banner.
CONTACT
We are at your disposal to help you use the library ADventori, contact us at op@adventori.com